Manual Installation
This page describes the manual installation procedure for Poweradmin. While using the installer is recommended for most users, manual installation can be useful for automated deployments or advanced users.
Prerequisites
Verify that your setup meets the application requirements. For detailed requirements, including PHP version, required extensions, and supported databases, see System Requirements.
Installation Steps
1. Prepare the Environment
Unpack the Poweradmin archive in a location accessible via your web server. Ensure unpacked files are readable by the user that your web server/PHP runs as.
2. Create Database User
Create a database user with SELECT, INSERT, UPDATE, DELETE rights on your PowerDNS database:
For MySQL/MariaDB:
CREATE USER 'poweradmin'@'localhost' IDENTIFIED BY 'secure_password';
GRANT SELECT, INSERT, UPDATE, DELETE ON powerdns.* TO 'poweradmin'@'localhost';
FLUSH PRIVILEGES;
For PostgreSQL:
CREATE USER poweradmin WITH PASSWORD 'secure_password';
GRANT SELECT, INSERT, UPDATE, DELETE ON ALL TABLES IN SCHEMA public TO poweradmin;
3. Import Database Structure
Import the Poweradmin database structure:
For MySQL/MariaDB:
mysql -u root -p powerdns < sql/poweradmin-mysql-db-structure.sql
For PostgreSQL:
psql -U postgres -d powerdns -f sql/poweradmin-pgsql-db-structure.sql
For SQLite:
sqlite3 /path/to/your/powerdns.db < sql/poweradmin-sqlite-db-structure.sql
Warning: The default login credentials are
admin/admin. You must change these credentials immediately after your first login for security reasons.
4. Create Configuration File
Create a config/settings.php file using the template below. A full list of configuration options can be found in config/settings.defaults.php.
Warning: When creating passwords for database, LDAP, or SMTP authentication, avoid using single quotes (
'), double quotes ("), backslashes (\), and line breaks. These characters can cause configuration file generation to fail during installation with cryptic PHP syntax errors.
<?php
/**
 * Poweradmin Custom Settings Configuration File
 */

return [
    /**
     * Database Settings
     */
    'database' => [
        'host' => 'localhost',
        'user' => 'poweradmin', // Database user created in step 2
        'password' => 'secure_password',
        'name' => 'powerdns',  // PowerDNS database name
        'type' => 'mysql',     // Options: 'mysql', 'pgsql', 'sqlite'
        // 'file' => '',       // Only for SQLite, provide full path to database file
    ],

    /**
     * Security Settings
     */
    'security' => [
        'session_key' => 'generate_a_random_string_here', // IMPORTANT: Change this!
    ],

    /**
     * DNS Settings
     */
    'dns' => [
        'hostmaster' => 'hostmaster.example.com',
        'ns1' => 'ns1.example.com',
        'ns2' => 'ns2.example.com',
    ],
];
For detailed configuration options, see Basic Configuration and Database Configuration.
5. Secure the Installation
- Set appropriate permissions on configuration files
- Remove the
installdirectory after installation - Change the default admin password immediately after first login
Web Server Configuration
Apache Configuration
Apache requires mod_rewrite to be enabled for Poweradmin to function correctly. Starting with v4.1.0, all pages use clean URLs (e.g., /login, /zones) which depend on URL rewriting.
- Enable the required Apache modules:
a2enmod rewrite headers
- Configure your VirtualHost:
<VirtualHost *:80>
    ServerName your-domain.com
    DocumentRoot /path/to/poweradmin

    <Directory /path/to/poweradmin>
        Options -Indexes +FollowSymLinks
        AllowOverride All
        Require all granted
    </Directory>

    # For DDNS update functionality
    RewriteEngine On
    RewriteRule ^/update(.*)$ /dynamic_update.php [L]
    RewriteRule ^/nic/update(.*)$ /dynamic_update.php [L]
</VirtualHost>
Warning: If you see 404 errors when accessing Poweradmin (e.g., on
/login), check that: (1)mod_rewriteis enabled:a2enmod rewrite && systemctl restart apache2, (2)AllowOverride Allis set in your VirtualHost or Apache configuration, (3) The.htaccessfile is present in the Poweradmin root directory.
You can verify `mod_rewrite` is loaded with: `apache2ctl -M | grep rewrite`
Important: Apache .htaccess File
The .htaccess file in the root directory is essential for Poweradmin to work properly. Starting with v4.1.0, it handles all URL routing (not just API requests).
Version-specific .htaccess files:
- For Poweradmin 4.0.x: Use the .htaccess from release/4.0.x branch
- For Poweradmin 4.1.x and later: Use the latest .htaccess from master branch
AllowOverride All must be set in your Apache configuration to allow the .htaccess file to function.
Nginx Configuration
For Nginx servers, use the complete configuration example provided in the Poweradmin repository.
Version-specific nginx configuration files:
- For Poweradmin 4.0.x with API support: Use the nginx.conf.example from release/4.0.x branch
- For other Poweradmin 4.x versions: Use the latest nginx.conf.example from master branch
Make sure to adjust the following settings for your environment:
server_name- Set to your domain nameroot- Set to your Poweradmin installation pathfastcgi_pass- Adjust PHP-FPM socket/TCP configuration as needed
Caddy Configuration
For Caddy servers, use the comprehensive configuration example provided in the Poweradmin repository. This configuration is actively used in the production Docker image and includes advanced security, API support, and performance optimizations.
Version-specific Caddy configuration files:
- For Poweradmin 4.0.x with API support: Use the Caddyfile.example from release/4.0.x branch
- For Poweradmin 4.1.x+: Use the latest Caddyfile.example from master branch
Make sure to adjust the following settings for your environment:
- Replace
your-domain.comwith your actual domain name for automatic HTTPS root- Set to your Poweradmin installation pathphp_fastcgi- Adjust PHP-FPM socket/TCP configuration as needed (default:localhost:9000)
Web Installer Wizard
As an alternative to manual installation, Poweradmin includes a web-based installer wizard that guides you through the setup process in 8 steps.
To use the wizard, navigate to your Poweradmin URL with the /install/ path (e.g., http://your-server/install/). The wizard will walk you through:
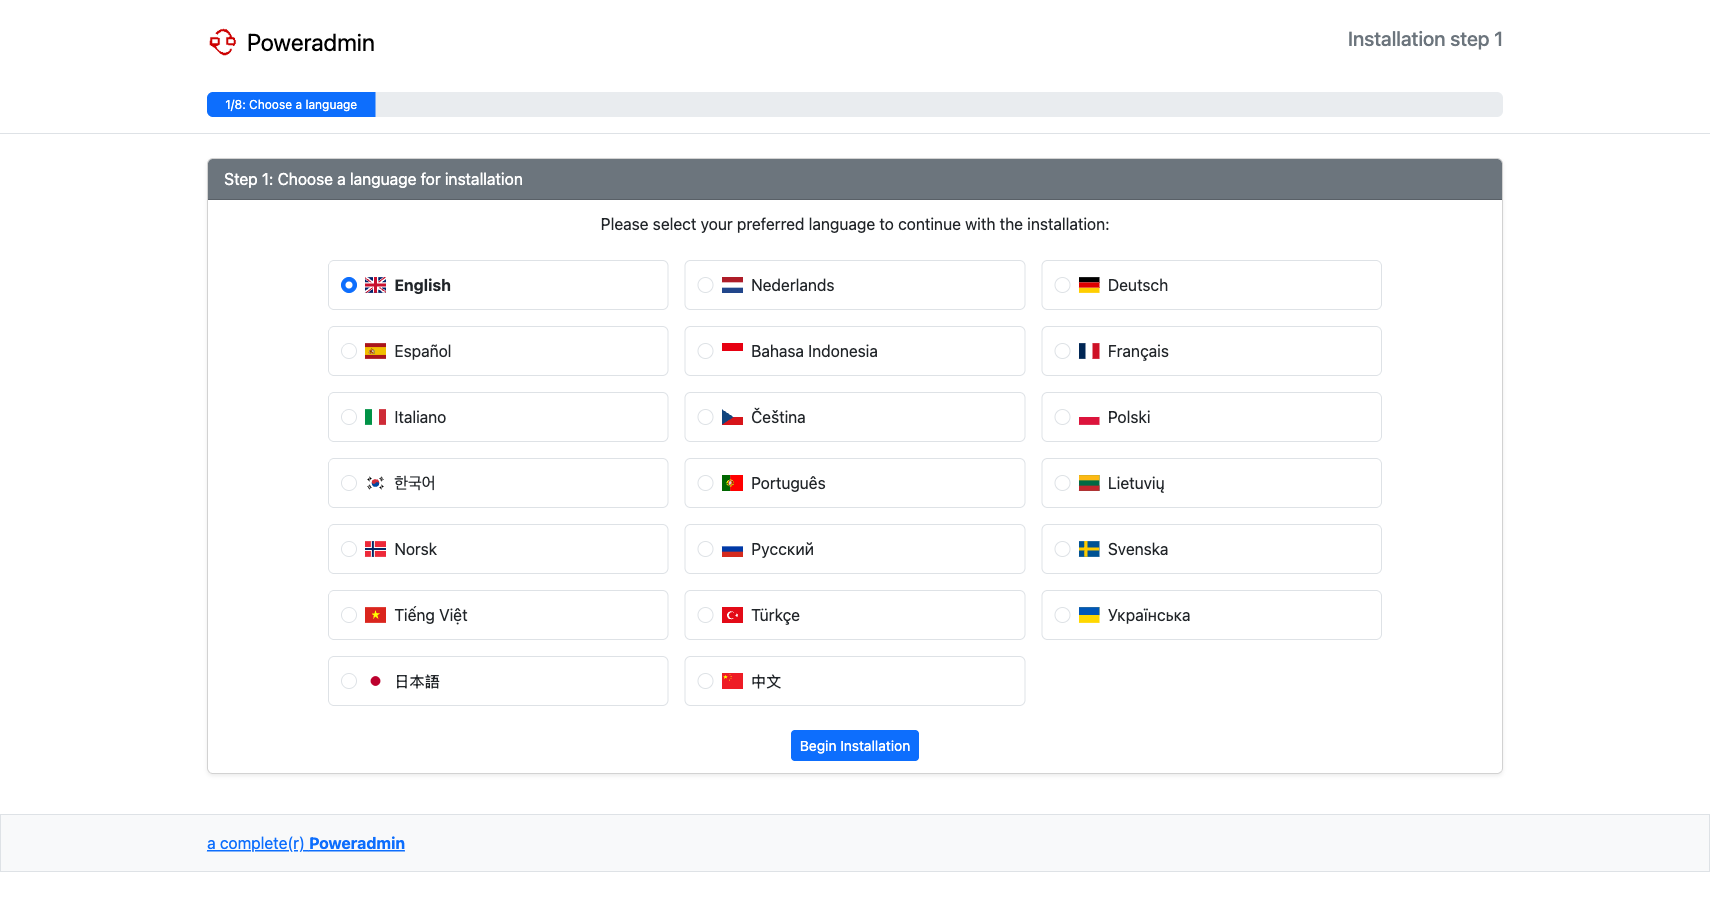
Step 1: Language Selection
Choose your preferred language for the installation process.
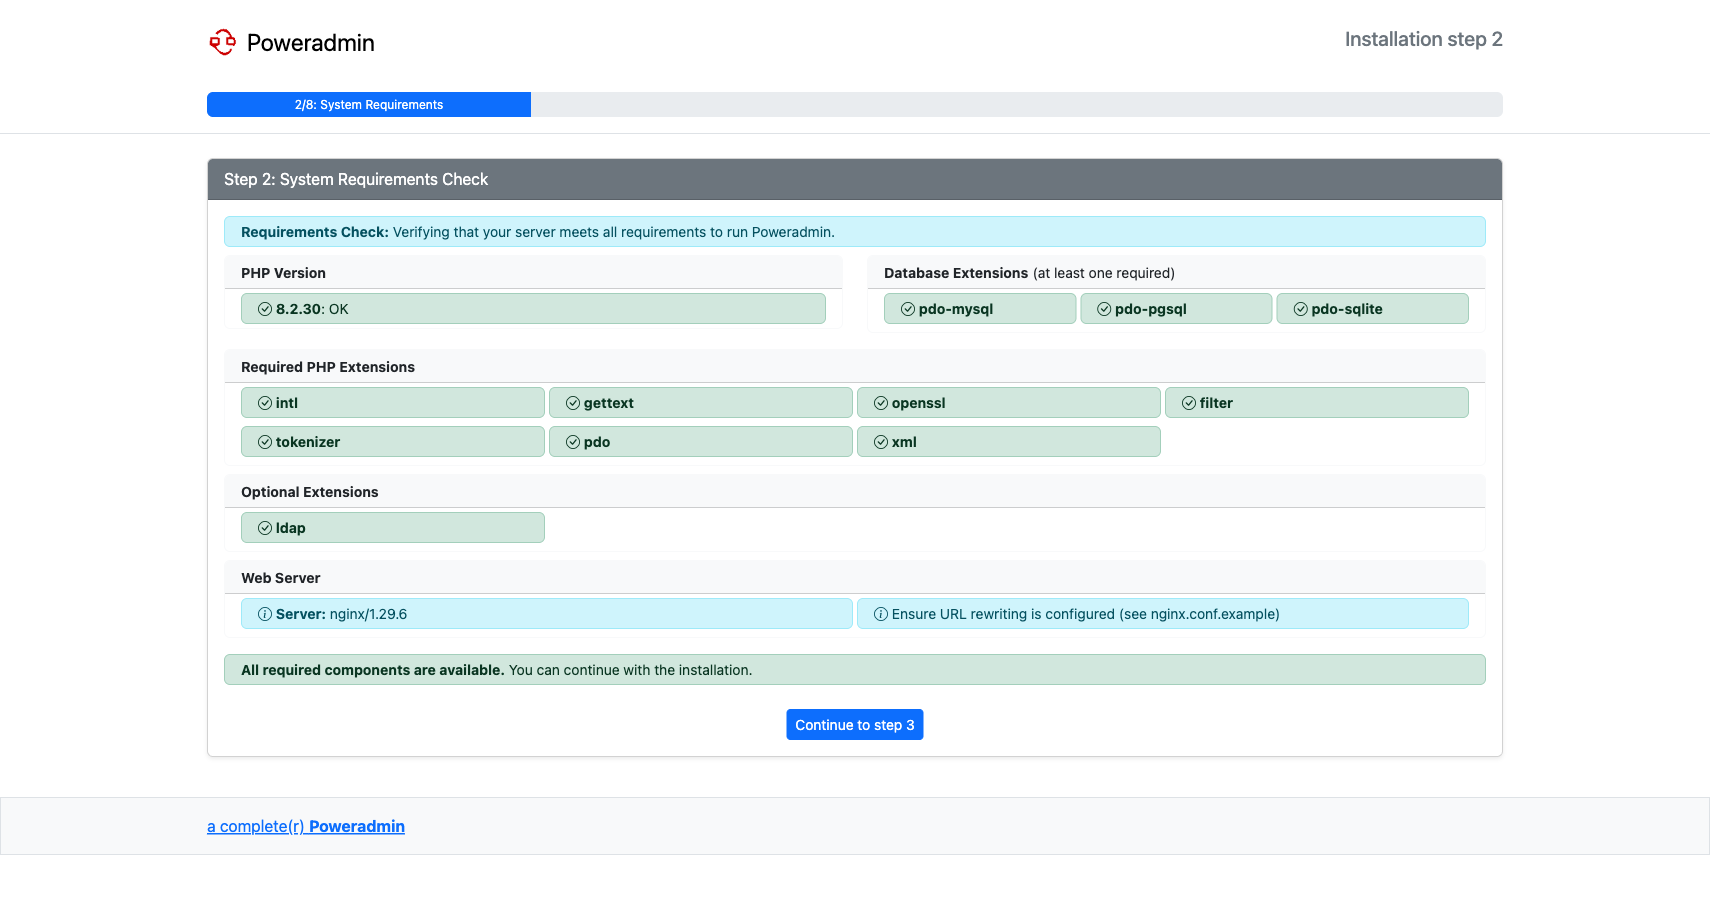
Step 2: System Requirements
The installer checks that your server meets all requirements, including PHP version, required extensions, and database drivers.
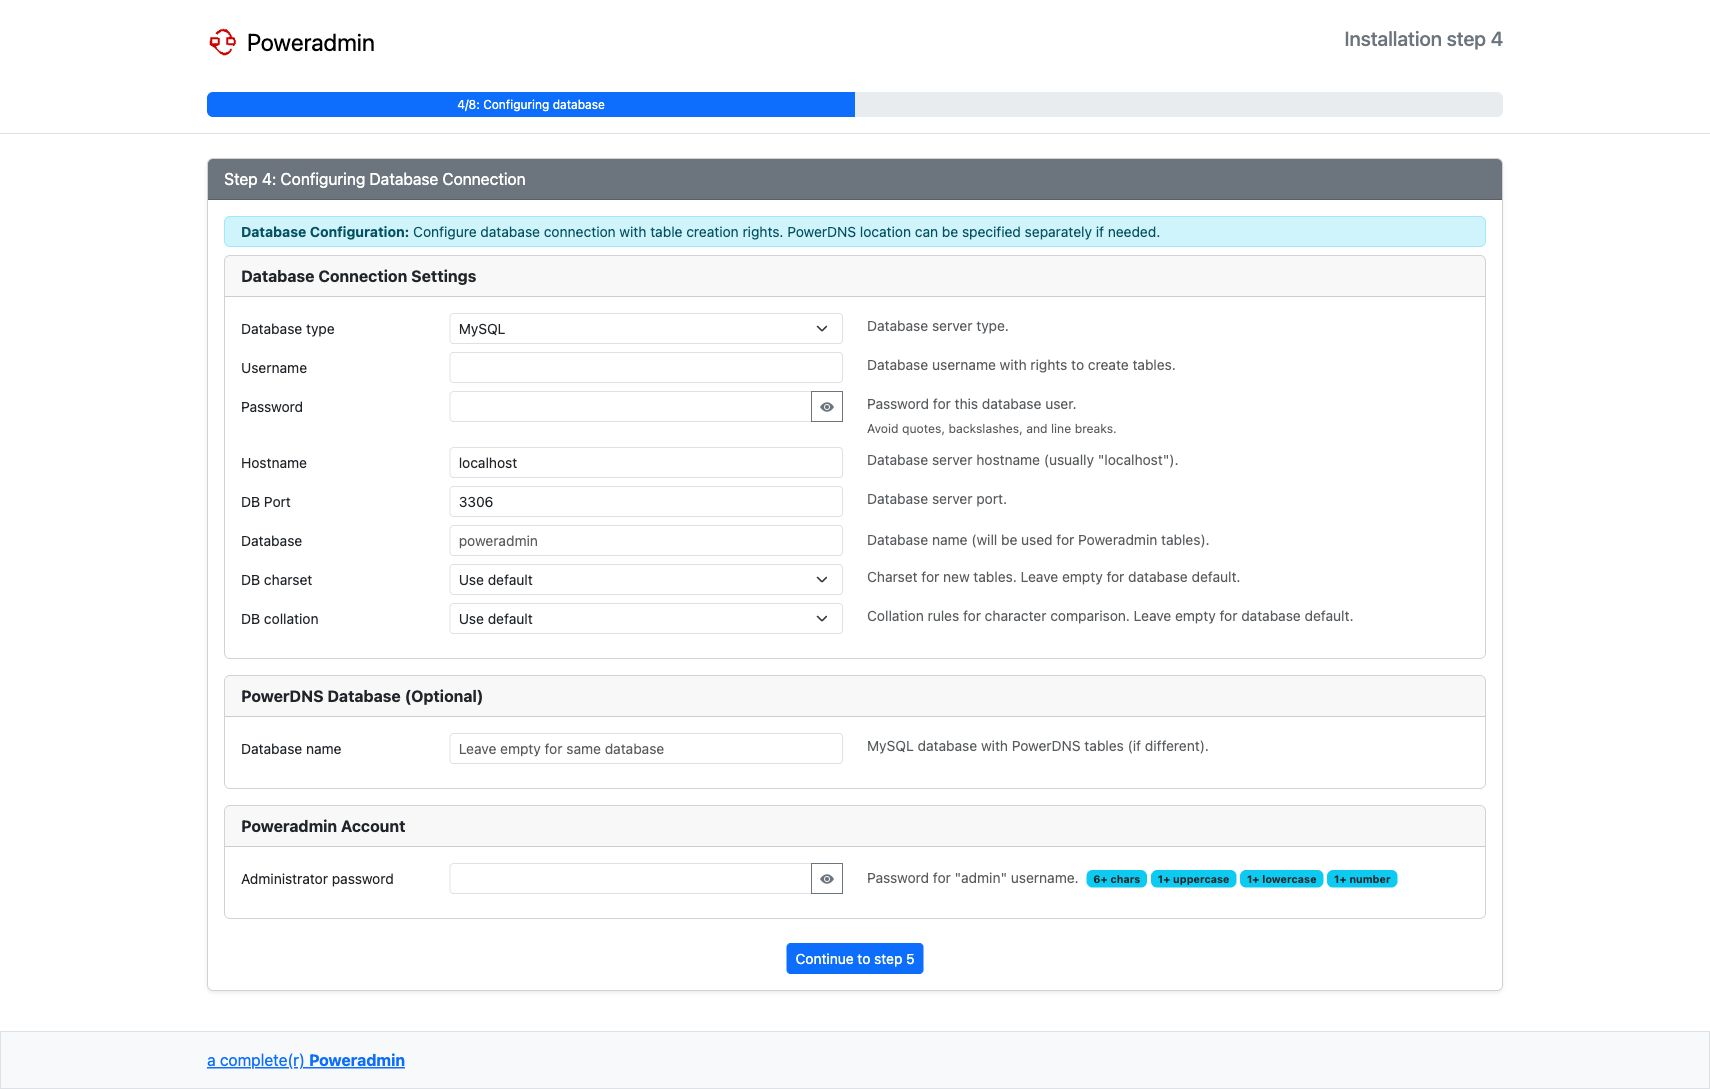
Step 4: Database Configuration
Configure your database connection, select the database type (MySQL, PostgreSQL, or SQLite), and set the administrator password.
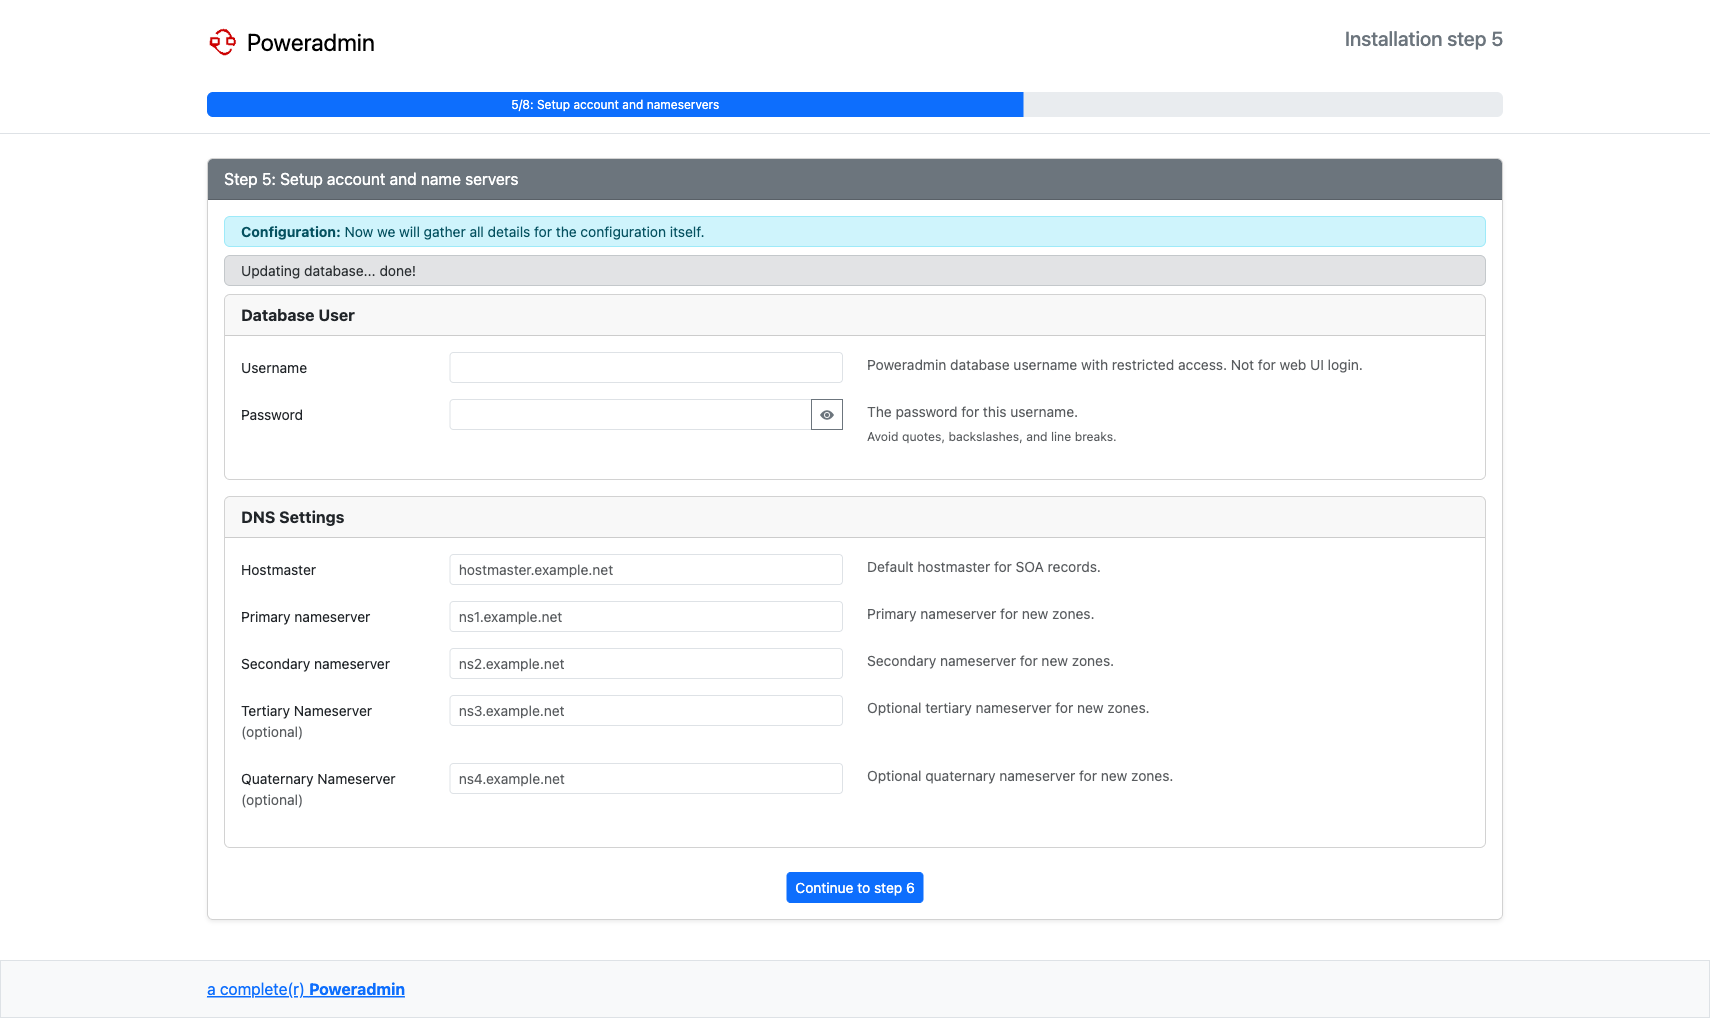
Step 5: Account & Nameservers
Configure the database user for runtime access and set up default DNS settings (hostmaster, nameservers).
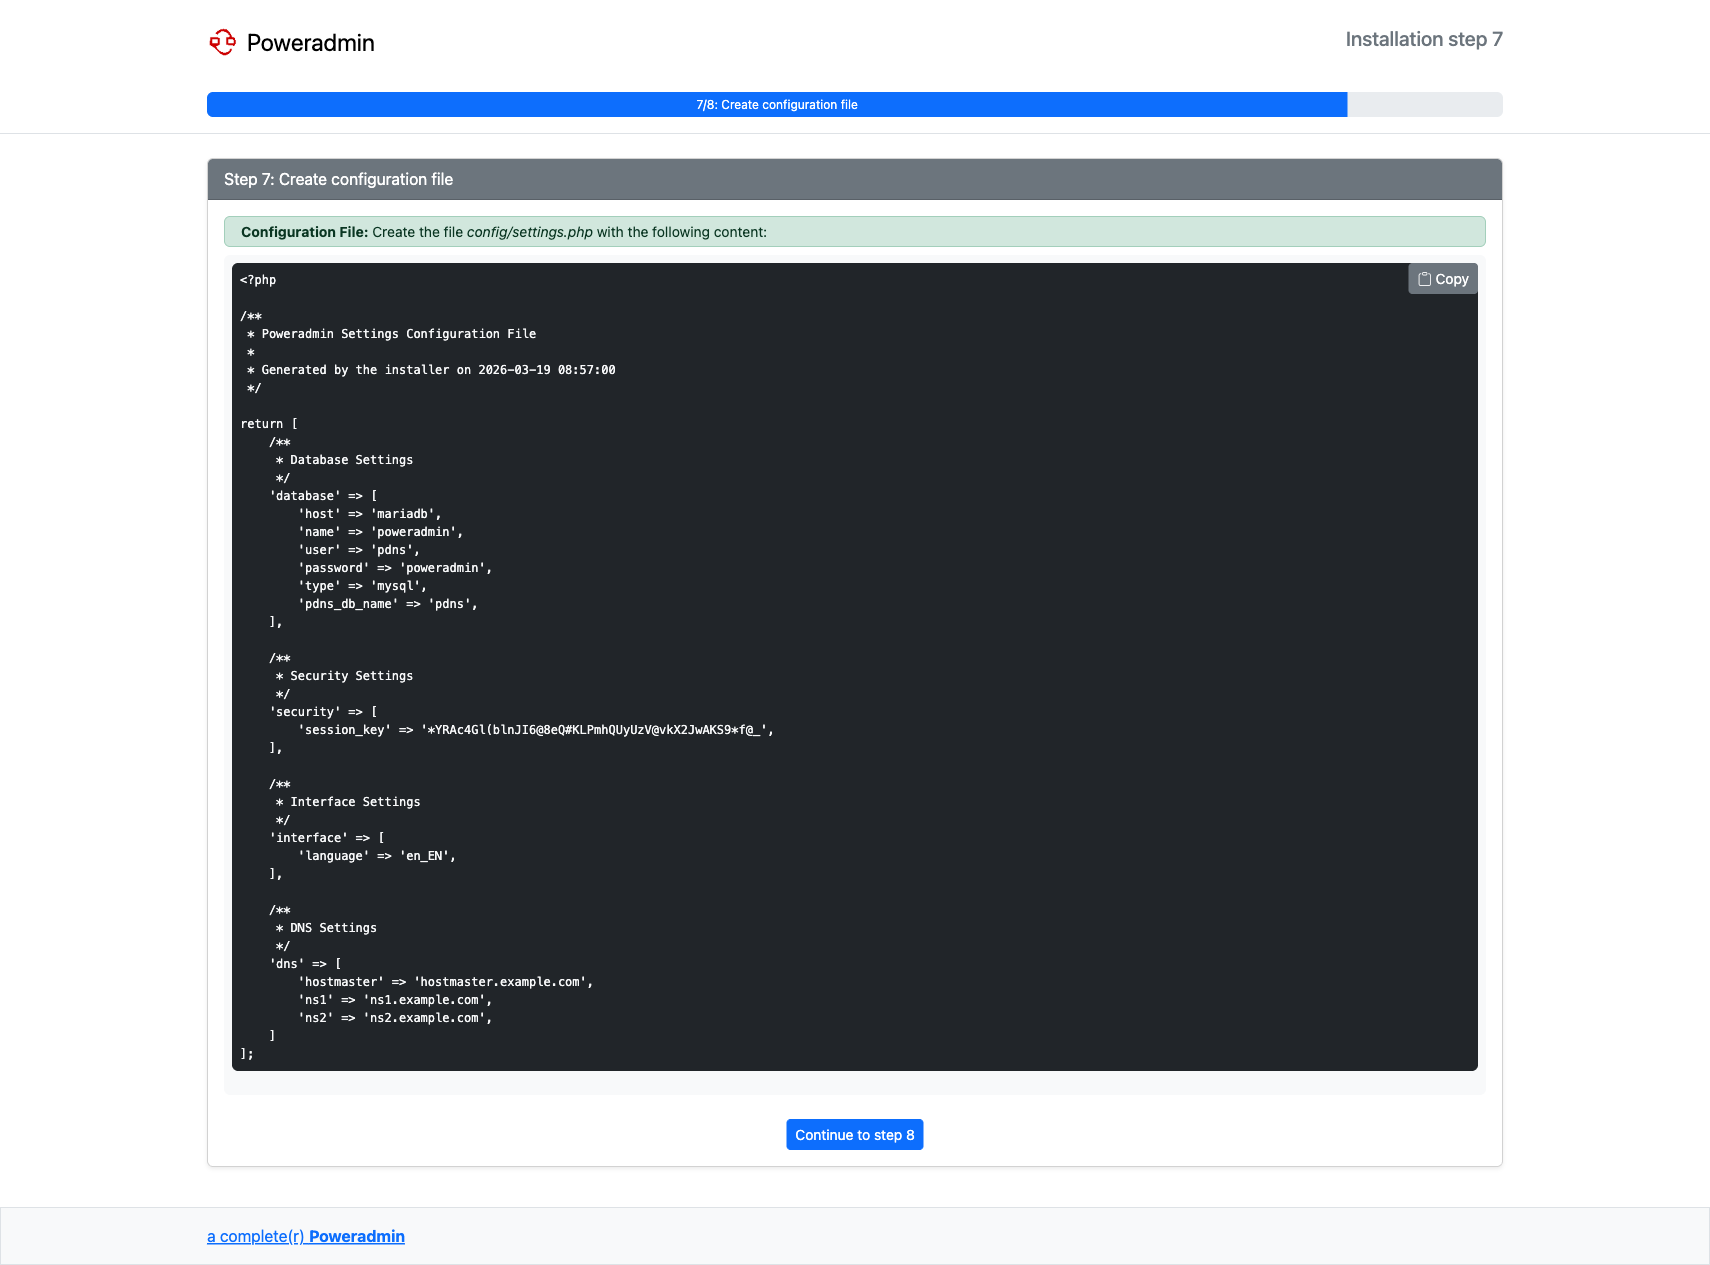
Step 7: Configuration File
The installer generates the config/settings.php file content. Copy this to your server.
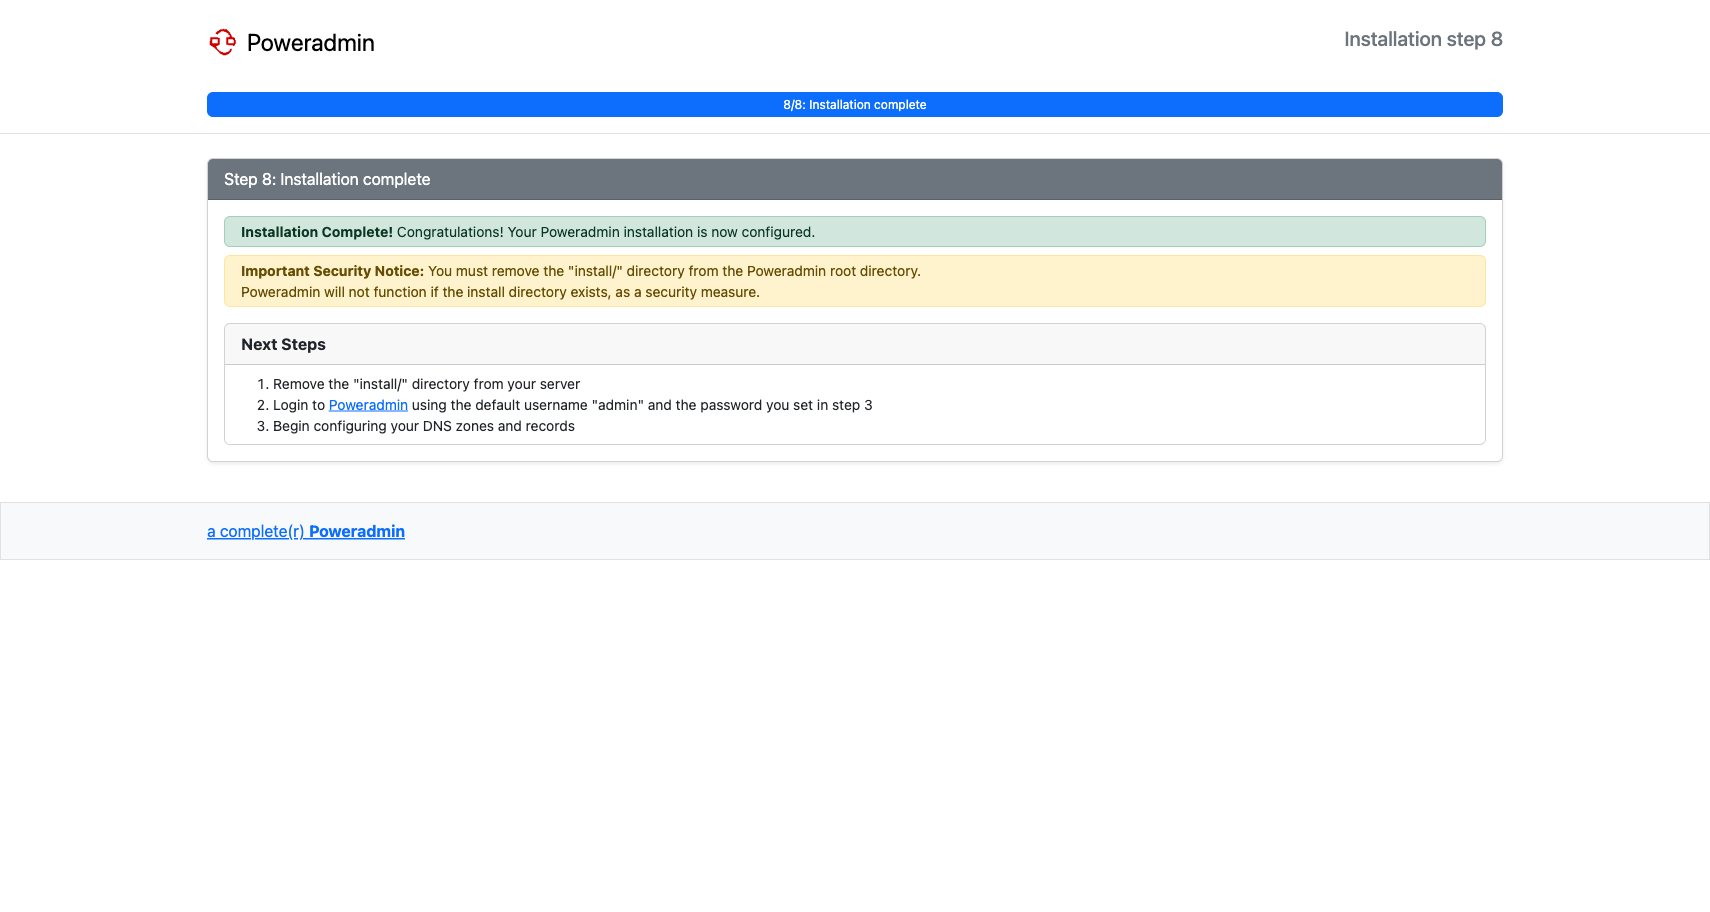
Step 8: Installation Complete
After creating the configuration file, the installation is complete. Remove the install/ directory for security.
Post-Installation Steps
- Configure web server permissions
- Set up proper DNS settings (see DNS Settings)
- Configure additional features as needed:
Troubleshooting
For common installation issues and solutions, see Debugging.