Layout Customization
Poweradmin allows you to customize various layout aspects to better fit your workflow. These settings are configured in the settings.php file under the interface section.
Customizing Header and Footer
Poweradmin supports custom header and footer templates through the theme system. These templates replace the visible logo/title area at the top of the page and the footer line at the bottom. They do not inject content into the page <head> element (see Injecting content into <head> below if you need that for analytics or custom meta tags).
Configuration
First, configure your theme settings in settings.php:
return [
    'interface' => [
        'theme' => 'custom',  // Set to 'custom' to use your custom templates
        'style' => 'light',   // Options: 'light', 'dark'
        'theme_base_path' => 'templates', // Base path for theme templates
        'title' => 'DNS Server 1', // Custom title to distinguish multiple server instances
    ],
];
Tip: If you manage multiple DNS servers, customize the title setting to easily distinguish between them. For example, use server names like "Production DNS", "ns1.example.com", or "DNS Server - East Coast" to quickly identify which server you're managing.
Creating Custom Templates
- Create a directory structure for your custom theme (see below)
- Create the following files (see sections below)
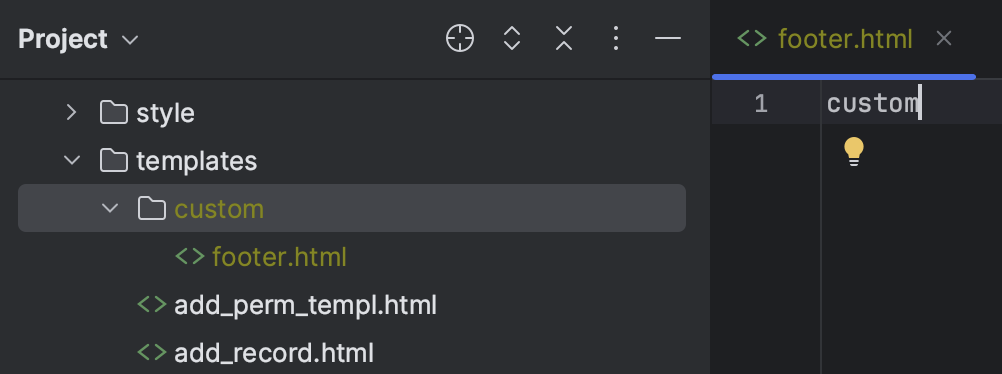
templates/
└── custom/
    ├── header.html
    ├── footer.html
    └── other template files...
Custom Header (templates/custom/header.html)
<!-- Your custom header content goes here -->
<img src="assets/your-logo.png" height="32">
<span class="fs-4">Your Custom Title</span>
Custom Footer (templates/custom/footer.html)
<!-- Your custom footer content goes here -->
<p>© 2025 Your Organization - Powered by <strong>Poweradmin</strong></p>
Here are examples of custom templates in action:
Custom Header File Structure
Custom Footer Example

Template Variables
The following template variables are available in your custom templates:
Header Template Variables
{{ iface_title }}- Application title from configuration settings (appears in browser tab and header){{ iface_style }}- Current theme style (light or dark){{ file_version }}- File version timestamp for cache busting
Footer Template Variables
{{ version }}- Poweradmin version{{ iface_style }}- Current theme style{{ file_version }}- File version timestamp for cache busting
Examples
Corporate Branding Header
<img src="assets/corporate-logo.png" height="40">
<span class="fs-4 ms-2">Corporate DNS Management Portal</span>
Extended Footer with Links
<div class="d-flex flex-column">
  <p class="mb-1">© 2025 Your Organization - DNS Management</p>
  <p class="mb-0 small">
    <a href="https://support.example.com" class="text-decoration-none">Support</a> |
    <a href="https://docs.example.com" class="text-decoration-none">Documentation</a> |
    <a href="mailto:dns-admin@example.com" class="text-decoration-none">Contact</a>
  </p>
</div>
UI Element Positioning
Form Element Positioning
Control the positioning of key UI elements:
- position_record_form_top: Place the "Add record" form at the top of the page. Default:
false - position_save_button_top: Place the "Save changes" button at the top of the page. Default:
false
return [
    'interface' => [
        'position_record_form_top' => true,
        'position_save_button_top' => true,
    ],
];
Content Display Options
Configure which information is displayed in the user interface:
- show_record_id: Show record ID column in edit mode. Default:
true - show_zone_comments: Show zone comments. Default:
true - show_record_comments: Show record comments. Default:
false - display_serial_in_zone_list: Show serial number in zone list. Default:
false - display_template_in_zone_list: Show template information in zone list. Default:
false - show_zone_record_count: Show record count column in zone lists. Each user can override this in their preferences. Default:
true
return [
    'interface' => [
        'show_record_id' => true,
        'show_zone_comments' => true,
        'show_record_comments' => true,
        'display_serial_in_zone_list' => true,
        'show_zone_record_count' => true,
    ],
];
Display Mode
Configure how the main index page displays information:
- index_display: Choose between card view or list view. Options:
cards,list. Default:cards
return [
    'interface' => [
        'index_display' => 'list',
    ],
];
Pagination
Control how many items appear per page:
- rows_per_page: Number of items displayed per page. Default:
10
return [
    'interface' => [
        'rows_per_page' => 20,
    ],
];
Zone Editing Features
Enable or disable special editing features:
- add_reverse_record: Add the checkbox option to create PTR records from A/AAAA record view. Default:
true - add_domain_record: Add the checkbox option to create A/AAAA records from PTR record view. Default:
true
return [
    'interface' => [
        'add_reverse_record' => true,
        'add_domain_record' => true,
    ],
];
Notes
- The custom templates use a simple templating system
- Changes may be overwritten during updates - keep backups of your custom files
- Custom header/footer templates render inside the page body (logo area / footer line). Scripts placed here run on every page but are not in
<head>. For analytics tags, see the next section.
Injecting content into <head>
Tracking snippets (Matomo, Plausible, Google Analytics), custom favicons, and additional meta tags need to live inside the page <head> element, not in the custom header template. Poweradmin does not expose a configuration setting for this - it gives you two supported paths instead.
Option 1: Fork the theme header template (simple, but upgrade-aware)
-
Copy your active theme's header to a custom theme directory, e.g.:
bash mkdir -p templates/custom cp templates/default/header.html templates/custom/header.html -
Set
theme: 'custom'insettings.php(see the configuration block earlier on this page). -
Open
templates/custom/header.htmland paste your snippet immediately before</head>. For example, a Matomo<noscript>tracker:html <script type="text/javascript" src="{{ base_url_prefix }}/assets/userSettings.js?time={{ file_version }}"></script> <noscript><p><img src="https://analytics.example.com/matomo.php?idsite=23" style="border:0;" alt="" /></p></noscript> </head>The full JavaScript tracker from Matomo/GA/Plausible goes in the same place.
-
Track the upstream
templates/default/header.html(ortemplates/modern/header.html) on each Poweradmin upgrade. If it changes, re-apply your edit on top of the new version.
Option 2: Reverse-proxy injection (upgrade-safe)
If Poweradmin sits behind Nginx or Apache, inject the snippet at the proxy layer so application updates never touch it. Example for Nginx with ngx_http_sub_module:
location / {
    proxy_pass http://poweradmin_upstream;
    sub_filter '</head>' '<script src="https://analytics.example.com/matomo.js" async></script></head>';
    sub_filter_once on;
    sub_filter_types text/html;
}
This is the recommended path for production deployments because it survives Poweradmin upgrades with no patching.
Why no configuration setting?
A custom_head_html config value would mean pasting a multi-line HTML/JavaScript block into config/settings.php. The configuration file is intended for short scalar settings, so HTML injection lives in templates or at the proxy layer instead.